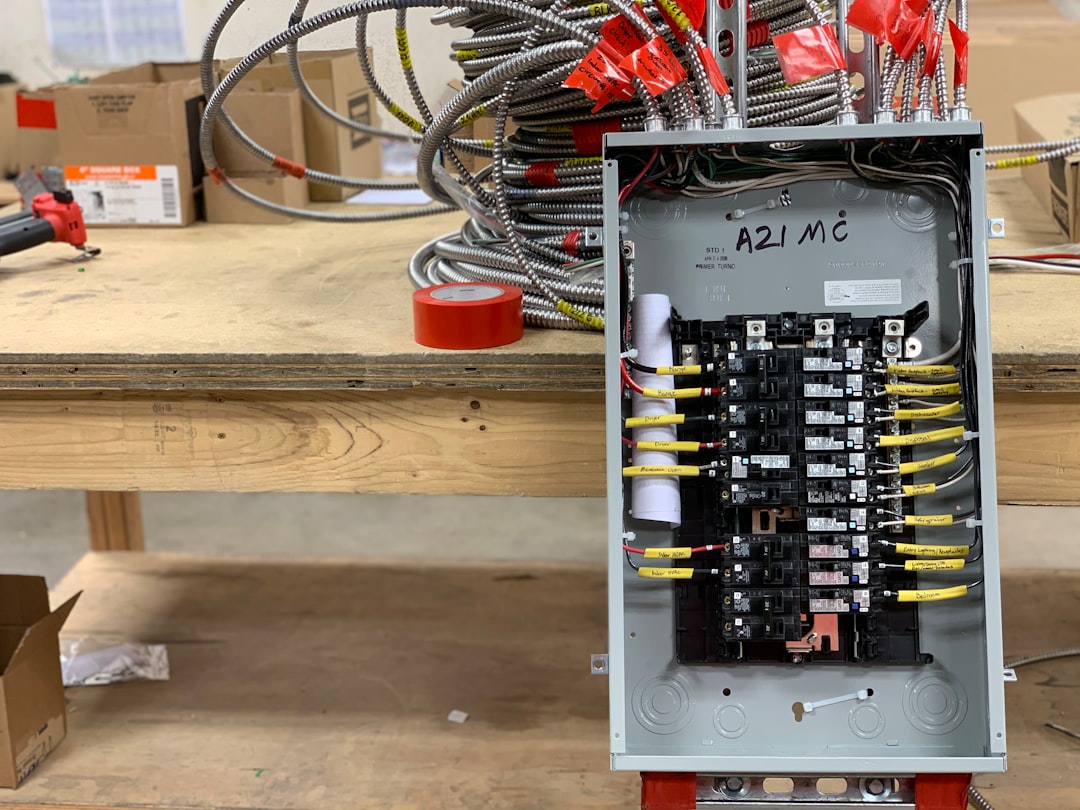
How to Install Low Voltage Old Work Boxes for Ethernet Wall Plates
Retrofitting your home with dedicated ethernet lines is one of the most effective ways to guarantee stable, high-speed connectivity for your smart devices, gaming consoles, and work-from-home setups. While wireless networks have advanced, physical cables remain the gold standard for latency-sensitive applications. When extending your wired local area network, learning how to install low voltage box brackets in your drywall is essential for achieving a polished, professional finish. Rather than allowing cables to awkwardly dangle from holes in your walls, using structured mounting brackets secures your ethernet wall plates and keeps your connections clean and reliable.
Structured cabling systems rely on physical boxes or open-frame brackets to support the termination of keystone jacks and faceplates. In residential settings, you do not need heavy electrical boxes for communication wiring. Instead, low-voltage old-work mounting rings provide the structural integrity required to secure ethernet plates directly to the drywall without being attached to wood studs. This guide covers everything you need to know to execute a flawless installation, from selecting tools to terminating the final wall outlets.
Why In-Wall Ethernet Outlets Are Superior to Wireless Connections
While modern mesh systems and high-end routers provide excellent coverage, they are inherently prone to environmental interference, signal attenuation, and channel congestion. Physical cables, particularly Category 6 and above, establish a dedicated, shielded channel for your data, bypassing these wireless limitations entirely. According to the Wikipedia structured cabling reference, a standardized cabling infrastructure provides a reliable foundation for all telecommunication services inside a building.
In-wall ethernet drops are particularly valuable in high-density environments like apartment complexes or closely spaced suburban houses. In these areas, dozens of competing wireless networks battle for the same limited frequency bands, leading to packet loss and latency spikes. By running physical drops and terminating them into clean wall plates, you bypass the airwaves entirely. Furthermore, in-wall cables are safely hidden behind drywall, protecting them from physical damage, pets, vacuum cleaners, and accidental trips.
Terminating your cables into dedicated outlets also adds significant resale value to your home. Future buyers increasingly look for structured wiring configurations that can support smart home hubs, security cameras, and remote workspaces. Setting up clean outlets makes your network modular and easy to manage, allowing you to swap out keystone jacks or upgrade to higher-bandwidth lines without opening the walls again. For distributing these wired connections throughout your property, check the Wikipedia network switch guide to understand how central distribution hardware links your wall drops together.
Planning Your In-Wall Cable Runs and Box Placement
Before cutting any holes, you must map your cable routes and identify the optimal locations for your ethernet wall plates. A successful installation requires avoiding active electrical lines, plumbing pipes, and structural wood studs. If you are retrofitting an older home, cable routing can be challenging due to fireblocks and unique architectural layouts. To help plan your routing through walls without damage, read our guide on how to add wired networking to an old house.
When selecting wall plate locations, aim for areas near your primary devices, such as behind entertainment centers, home office desks, or smart home control hubs. Avoid locating them directly opposite electrical outlets on the same stud bay, as this can increase the risk of electromagnetic interference and make cable fishing more difficult. Keep your ethernet drops at least six inches away from high-voltage electrical lines.
To locate wood studs behind the drywall, use a reliable stud finder. Mark the boundaries of each stud in the desired area so you can position your low-voltage bracket in the open stud bay. Once you have identified a clear stud bay, use a drywall hand saw or utility knife to make a small probe hole. Gently insert a bent coat hanger or wire probe into the hole to feel for any hidden obstacles, such as electrical conduits or plumbing pipes, before committing to a full cut.
Step-by-Step Guide: How to Install Low Voltage Box
Executing this installation successfully requires careful preparation and precise execution. By following these steps, you will ensure a professional-looking and durable outlet installation.
-
Step 1: Mark the Cutting Template
Most low-voltage brackets feature a built-in template or can be traced directly. Hold the bracket against the wall where you want to install low voltage box hardware. Ensure the bracket is perfectly level using a small bubble level. Trace the inside opening of the bracket onto the drywall with a pencil. Double-check your lines to confirm the cutout will be level and properly positioned within the stud bay. -
Step 2: Cut the Drywall with Precision
Insert the tip of a drywall jab saw into one corner of your penciled outline. Carefully saw along the traced lines, keeping your hand steady. Maintain a 90-degree angle to the wall to ensure a clean, vertical edge. Cut slowly to prevent tearing the paper backing of the drywall. Once all four sides are cut, remove the drywall cutout and vacuum any plaster dust from the opening. -
Step 3: Fish and Route Your Ethernet Cables
With the hole open, you can now fish your network cable down from the attic or up from the crawlspace. For vertical runs, use a fiberglass fish tape to pull your high-quality Category 6 cable through the wall cavity. Ensure you leave at least 12 to 18 inches of slack hanging out of the cutout to make termination and testing easier. -
Step 4: Insert and Secure the Bracket
Feed the slack ethernet cable through the center opening of your low-voltage bracket. Insert the bracket into the drywall cutout. The outer bezel of the bracket should sit flush against the wall surface. Using a screwdriver, tighten the mounting screws on the bracket. This action rotates the mounting tabs (wings) behind the drywall, pulling them tight against the rear surface. Tighten the screws until the bracket is securely locked in place, taking care not to overtighten and strip the plastic threads. -
Step 5: Terminate the Cables and Attach the Wall Plate
Once the bracket is secured, terminate your ethernet cables into RJ45 keystone jacks. Ensure you follow standard wiring schemes (either T568A or T568B) using a punch-down tool. For a detailed walkthrough of this critical step, refer to our comprehensive guide on how to terminate cat6a ethernet cables. Snap the terminated keystone jacks into your wall plate, tuck the excess cable back into the wall cavity, and secure the wall plate to your newly installed low-voltage bracket using the provided screws.
Recommended Hardware for In-Wall Cable Projects
For a safe and professional installation, using high-quality components is essential. Before you purchase your materials, planning to install low voltage box templates on your order list is a smart step. Here is the highly recommended gear for your low-voltage networking projects.
Arlington Low Voltage Mounting Brackets
The Arlington LV1 is the industry standard for securing single-gang low-voltage faceplates flush to the drywall.
💰 Buy on Amazon → Arlington Low Voltage Mounting Brackets
This high-quality mounting bracket is designed specifically for retrofitting existing walls. Its sturdy plastic construction and reliable drywall wings ensure a rock-solid mount that will not wobble or pull loose when you plug and unplug ethernet patch cords. The open back design provides ample room for routing bulky cables and maintaining the proper bend radius for high-performance lines.
Low Voltage Old Work Box
For projects requiring multiple network drops or custom wall plate configurations, a multi-gang old-work bracket is essential.
💰 Buy on Amazon → Low Voltage Old Work Box
These versatile non-metallic mounting rings provide the perfect structural support for larger wall plates. They are designed to accommodate standard low-voltage keystone inserts, coaxial connectors, and HDMI pass-through jacks. The integrated swing-out clamps pull tightly against drywall ranging from 1/4-inch to 1-inch thick, guaranteeing a long-lasting and flush installation.
Fiberglass Fish Tape Kit
A durable fish tape is the ultimate tool for guiding ethernet cables through tight wall cavities and across ceilings.
💰 Buy on Amazon → Fiberglass Fish Tape Kit
This professional-grade fish tape features high-strength fiberglass rods that resist kinking and easily glide past insulation. The threaded connectors allow you to attach various hook and guide accessories, making it incredibly simple to grab cables in dark wall cavities. It is an indispensable tool for any home DIYer planning to install low-voltage cabling across multiple floors.
Ethernet Wall Plate Keystone
To complete your wall drop, you need high-density, professional faceplates that clean up your network terminations.
💰 Buy on Amazon → Ethernet Wall Plate Keystone
These single-gang faceplates are equipped with standard keystone openings, allowing you to customize your ports for ethernet, telephone, or coax connections. They are made of impact-resistant plastic and include color-matched mounting screws that attach directly to low-voltage brackets. The flush design ensures a modern, clean look that blends seamlessly into any home decor.
Cat6A Ethernet Cable
For future-proof high-speed data transmission, structured cabling projects should always utilize solid copper Cat6A lines.
💰 Buy on Amazon → Cat6A Ethernet Cable
This high-performance bulk ethernet cable features solid bare copper conductors and robust shielding, providing full support for 10-Gigabit network speeds over long distances. It is ideal for in-wall runs, riser installations, and connecting smart home hubs to your central network switch. The durable jacket is marked with sequential foot indicators for easy measurement during installation.
Frequently Asked Questions about Low-Voltage Boxes
To help you successfully complete your project, we have compiled answers to the most common questions regarding low-voltage installation practices.
Do I need a permit to install a low-voltage box?
In most residential jurisdictions, running low-voltage communication cabling (such as ethernet, speaker wire, or coaxial cables) does not require an electrical permit. This is because these cables carry negligible electrical current and present no shock or fire hazard under normal operating conditions. However, always check your local building codes and regulations, especially if you are running cables through fire-rated commercial walls or multi-family residential structures, which may require plenum-rated cables.
Can low-voltage mounting brackets be used for electrical outlets?
Absolutely not. Low-voltage old-work brackets are open-frame rings that have no back enclosure. High-voltage electrical wiring (120V and above) carries significant currents that present fire and shock hazards, and national electrical codes mandate that all high-voltage connections be fully enclosed within a sealed plastic or metal electrical box. Using low-voltage brackets for high-voltage outlets is a severe code violation and a dangerous fire hazard.
How do I cut drywall cleanly without making a mess?
Drywall plaster dust can easily spread throughout your home if not properly managed. When you cut holes to install low voltage box rings, hold a damp sponge or a shop vacuum nozzle directly below your drywall saw as you make the cuts. Alternatively, you can tape a small paper cup or envelope to the wall directly beneath your cutting outline to catch the gypsum dust and drywall debris as they fall.
What should I do if I hit a stud while cutting drywall?
If you hit a wood stud while cutting, stop sawing immediately. If you have only made a small cut, you can easily patch the drywall and shift your cutout location a few inches to the left or right to clear the stud. If you have already cut a larger opening, you can modify the mounting bracket by removing one of the drywall wings and screwing the plastic bezel directly into the side of the wood stud using standard wood screws.
What is the difference between old-work and new-work boxes?
New-work boxes are designed to be installed during new construction or major renovations before the drywall is hung. They feature integrated nails or brackets that are secured directly to structural wood studs. Old-work boxes, also known as retrofit boxes, are designed to be installed after the drywall has been hung. They insert into a pre-cut hole and use integrated swing-out clamps or wings that lock tightly against the back of the drywall.
How do I know if a wall contains hidden pipes or wires?
Before making any cuts, look for clues on both sides of the wall. Check for nearby plumbing fixtures, radiators, or appliances that might indicate vertical plumbing runs. For electrical lines, look for nearby light switches, power outlets, or thermostats. Electrical wires typically run horizontally or vertically from these boxes. If you are uncertain, run a specialized stud finder that features live AC voltage detection over the chosen wall area before sawing.
How do I install low voltage box systems in insulated walls?
When you install low voltage box templates in insulated exterior walls, the fiberglass batting can create significant friction and block your fishing tools. To overcome this obstacle, push your fish tape behind the insulation (against the drywall) rather than through the middle of the fiberglass. This technique keeps the cable path clear and prevents the fiberglass from tangling or tearing as you pull the ethernet lines into position.\n


One Comment
Comments are closed.