How to Wall Mount a Smart Home Tablet Dashboard
A smart home is only as useful as its interface. While voice commands and automated triggers handle routine tasks, having a dedicated physical dashboard brings a new level of control to your household. If you want to control your home automation setup easily, learning how to select and install a professional smart home tablet mount is one of the most rewarding projects you can undertake. It provides a central command center for family members and guests who may not have your smart home application installed on their personal devices. In this comprehensive guide, we will cover everything from hardware selection and physical mounting to routing low-voltage power and configuring your kiosk software.
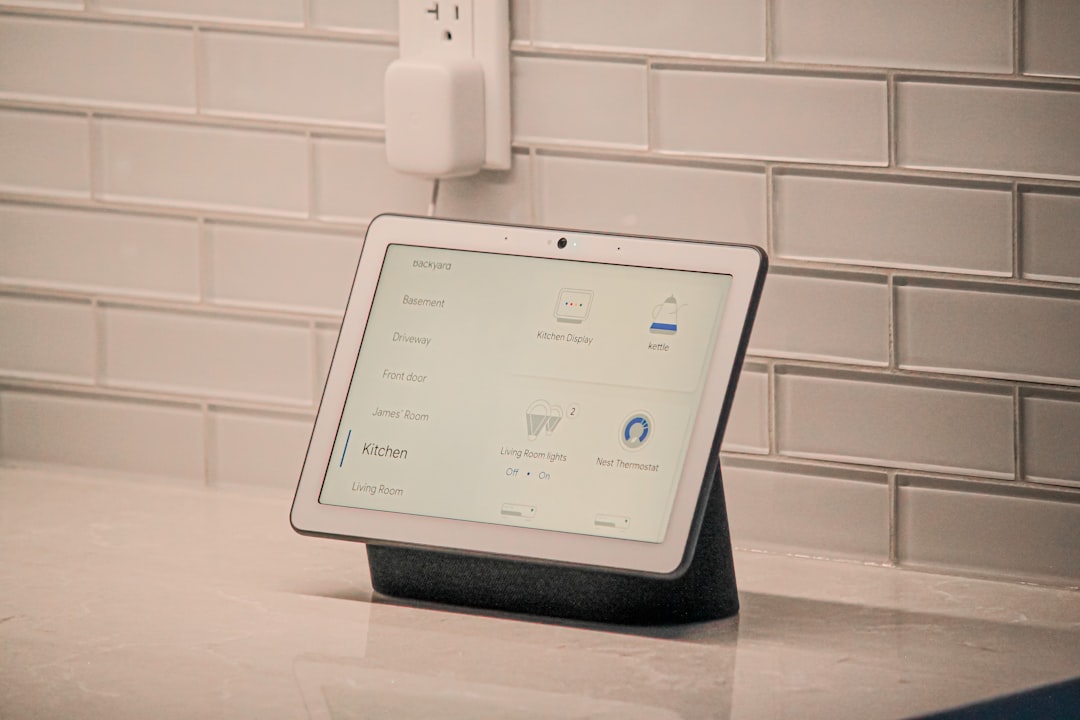
A wall-mounted dashboard transforms how you interact with your living space. By bringing Home Assistant, Hubitat, or Apple Home dashboards out of your pocket and onto the wall, you gain immediate visibility into security cameras, lighting states, climate settings, and energy monitoring. It bridges the gap between complex background automation and intuitive manual overrides, ensuring that your home remains easy to navigate for everyone.
Choosing the Right Smart Home Tablet Mount and Hardware
Selecting the ideal tablet is the foundation of a successful installation. You need a device that is reliable, has a bright and clear screen, and fits within your budget. Let’s look at the most common tablet options for wall-mounted dashboards in 2026.
Amazon Fire HD 10 Tablet
The Amazon Fire HD 10 is the ultimate budget choice. Its 10.1-inch screen offers plenty of screen real estate, and it is highly compatible with third-party kiosk software. For most homeowners, this is the default hardware to pair with your smart home tablet mount choice.
💰 Buy on Amazon → Amazon Fire HD 10 Tablet
Amazon Fire HD 8 Tablet
The Amazon Fire HD 8 is a compact alternative. It is excellent for smaller rooms, hallways, or bedside control stations where a full-sized tablet would look obtrusive. It pairs nicely with a smaller smart home tablet mount bracket.
💰 Buy on Amazon → Amazon Fire HD 8 Tablet
Apple iPad
Premium build quality and excellent screens. However, iPads are significantly more expensive and their battery management can be more challenging when permanently plugged in.
Samsung Galaxy Tab A Series
A great middle-ground Android option that offers native Google Play Store access without needing workaround installations.
Before you make any cuts in your drywall, you must decide which room and height is best when you wall mount smart home tablet hardware. The height should be comfortable for adult eye level, typically around 58 to 60 inches from the floor, but you must also consider accessibility for shorter family members.
Planning Your Installation and Power Delivery
To successfully run wires behind your smart home tablet mount, you need a reliable power delivery system. Leaving a cable hanging down the wall ruins the clean, built-in aesthetic you want.
Power Delivery Options
- Power over Ethernet (PoE) — This is the gold standard for tablet dashboards. Using a PoE Texas or similar splitter, you run a single Cat6 cable from your PoE switch to a small adapter behind the tablet. This adapter splits the signal into power and data, providing continuous charging over a thin, easy-to-route cable.
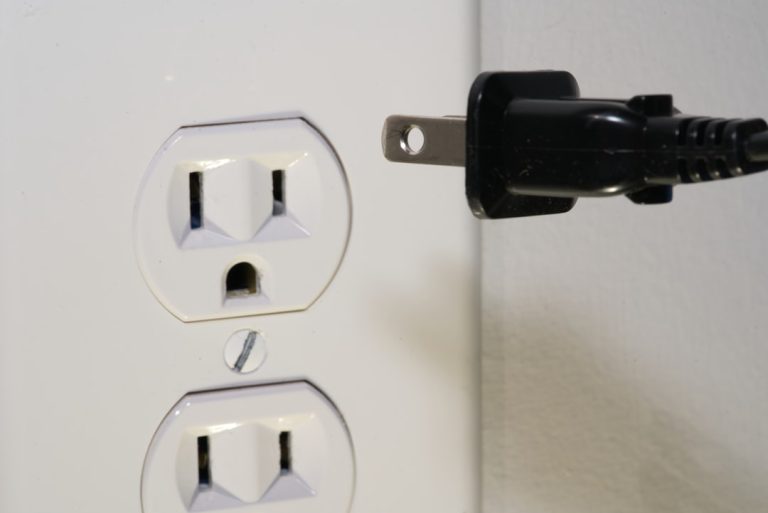
- Recessed Outlet and USB Charger — If you already have electrical wiring in the wall, you can install a recessed old-work box and a standard outlet with built-in USB ports. This allows you to tuck a low-profile USB cable and charger completely behind the mount.
- Low-Voltage Extension Cables — You can run a long micro-USB or USB-C extension cable behind the drywall to a nearby outlet. When using this method, ensure you use a high-quality, heavy-gauge cable to prevent voltage drop over long distances.
Many homeowners who want to build a smart home tablet mount setup choose to place them near main entryways or in the kitchen. This guarantees quick access when entering or leaving the house. When planning your layout, it is helpful to reference a general guide on building a smart home from scratch in 2026 to ensure your dashboard integrates perfectly with your broader ecosystem.
Step-by-Step Physical Mounting Guide
Once you have chosen your tablet and power delivery method, it is time for the physical installation. Having the right tools on hand will make this process clean and efficient.
Required Tools
- Stud finder
- Drywall saw
- Level and pencil
- Low-voltage old work box (mounting bracket)
- Flathead and Phillips head screwdrivers
- Fish tape (if routing wires through closed walls)
Installation Steps
- Locate Studs and Avoid Wires — Use your stud finder to locate the studs in the wall. You want to install your mount in the cavity between studs, but not directly on top of them. Check both sides of the wall for existing electrical outlets or switches to avoid accidentally cutting into live wiring.
- Mark and Cut the Opening — Hold your low-voltage old work box against the wall at your chosen height. Use your level to ensure it is straight, then trace around the outer edge with a pencil. Use your drywall saw to carefully cut along the traced line.
- Route the Low-Voltage Cable — If you are running a PoE line or a low-voltage USB extension, drop your cable from the cut opening down to the basement, attic, or nearest outlet. Using a professional fish tape kit makes routing wires through tight wall cavities painless.
- Install the Old Work Box — Insert the low-voltage bracket into the cut hole. Tighten the screws on the corners; this will flip up the plastic drywall wings behind the wall, clamping the bracket firmly in place.
- Attach the Tablet Mount — Secure your chosen VESA mount or custom enclosure to the low-voltage bracket. Connect your power adapter to the tablet, tuck the excess cable into the recessed box, and secure the tablet inside the frame.
For a clean visual result, choosing the right hardware accessories is critical. Below are the recommended tools and components to complete your smart home tablet mount build.
Tablet Wall Mount VESA
Using a high-quality bracket like a dedicated tablet wall mount ensures a flush fit and professional finish. This prevents the tablet from shifting or shaking when you tap on the screen.
💰 Buy on Amazon → Tablet Wall Mount VESA
Low Voltage Old Work Box
The low voltage old work box is essential for securing the back of the mount in the drywall and housing the cables.
💰 Buy on Amazon → Low Voltage Old Work Box
Fiberglass Fish Tape Kit
A professional fiberglass fish tape kit makes routing wires through tight wall cavities completely painless.
💰 Buy on Amazon → Fiberglass Fish Tape Kit
Ethernet Wall Plate Keystone
The Ethernet wall plate keystone lets you terminate your behind-the-wall wiring cleanly.
💰 Buy on Amazon → Ethernet Wall Plate Keystone
Network Cable Tester RJ45
A network cable tester RJ45 is essential to verify that your low-voltage runs are correct before mounting.
💰 Buy on Amazon → Network Cable Tester RJ45
Software Configuration and Kiosk Mode
Once you secure the bracket, the next phase of your smart home tablet mount project is configuring the dashboard software. You want the tablet to act as a dedicated kiosk, meaning users cannot close the smart home interface or wander into other applications.
For Android and Fire OS devices, Fully Kiosk Browser is the industry standard. This powerful utility locks down your device, loads your Home Assistant dashboard automatically on boot, and provides deep integration with your home network. You can configure it to use the tablet’s front-facing camera for motion detection, waking the screen when you approach and turning it off when the room is empty.
For iOS users, Apple’s native Guided Access mode offers similar lockdown capabilities. It prevents users from exiting the active application and disables physical buttons. When building your interface, focus on large touch targets, clear text, and high-contrast color schemes. If you are designing for a complex setup, make sure you understand how Matter smart home standards in 2026 simplify device integration, allowing you to control local accessories directly from your dashboard with minimal latency.
Long-Term Maintenance and Battery Protection
Permanent wall mounting introduces unique challenges for tablet longevity. The primary concern is battery health. Leaving a lithium-ion battery plugged in at 100% capacity in a warm wall enclosure can lead to battery swelling and premature hardware failure. This issue is why a smart home tablet mount setup must be paired with automated battery protection rules.
Battery Care Practices
- Implement Charge Cycling — Use a smart plug and a simple home automation rule to control the charger. Turn the charger on when the tablet battery drops to 20%, and turn it off when it reaches 80%. This prevents the battery from remaining at peak voltage indefinitely.
- Configure Screen Sleep Timers — Set the screen to turn off after 1 to 2 minutes of inactivity. Leaving the screen on 24/7 leads to panel burn-in and generates unnecessary heat inside the wall cavity.
- Ensure Proper Ventilation — Make sure your wall mount or custom enclosure has small air gaps to allow heat to escape. Avoid placing the tablet in direct sunlight or directly above heat registers.
Managing your tablet’s power budget is a vital part of planning. In some cases, you may want to integrate your dashboard’s power supply with a broader backup system. Reading about smart home battery backups and automation grid protection can give you some great ideas on how to keep your home dashboard active during a power outage.
For advanced automation enthusiasts, you can even configure your dashboard to send system health reports to a local server. If you want to dive deeper into local hosting and custom integrations, check out resources on Home Assistant official hardware options and third-party tools on GitHub to expand your home network’s capabilities. For more ideas on physical build configurations, the official Raspberry Pi foundation website offers wonderful projects for building secondary auxiliary displays.
Frequently Asked Questions
Do I need a professional to install a smart home tablet mount?
No, with basic tools like a drywall saw, level, and stud finder, most DIYers can complete the installation in a few hours. The physical mounting is easy, and running low-voltage wiring like Ethernet or USB extension cables does not require an electrician. However, if you are planning to tap into existing 120V household lines for a recessed outlet, hiring a licensed electrician is highly recommended to ensure compliance with local electrical codes.
Is a PoE adapter required for a smart home tablet mount install?
While not strictly mandatory, using Power over Ethernet (PoE) is the most stable and professional way to deliver continuous power. It combines power and network data into a single thin Cat6 cable, preventing the WiFi dropouts that can occur when a tablet is enclosed inside a wall. If you do not have a PoE switch, you can use a basic PoE injector or run a long low-voltage USB power cable to the nearest standard wall outlet instead.
How do I prevent the tablet battery from swelling?
To prevent battery swelling, you should never leave the tablet plugged in 24/7 at 100% charge. The best approach is to connect the USB charger to a smart plug and configure your smart home platform to cycle the charge. Create an automation that turns the smart plug on when the tablet battery falls below 20% and turns it off once it reaches 80%. Additionally, ensure your wall mount enclosure has sufficient ventilation slots to prevent heat buildup.
Can I use an old iPad or is a new Android tablet better?
While old iPads have beautiful screens, older iOS versions can struggle to run modern smart home web dashboards smoothly. Older devices also lack advanced kiosk features like front-camera motion detection for screen waking. Android devices, particularly budget-friendly options like the Fire HD 10 or Galaxy Tab, offer much better flexibility, native support for Fully Kiosk Browser, and easier software customization for dedicated smart home use.
What is Fully Kiosk Browser and why should I use it?
Fully Kiosk Browser is a specialized Android web browser designed specifically for digital signage and interactive tablet displays. It locks down the tablet so users cannot access settings or exit your dashboard. It also includes advanced features like camera-based motion detection to wake the screen, remote administrative management, auto-reload on connection loss, and integration with local APIs, making it the perfect companion for home automation dashboards.