How to Extend WiFi to a Detached Garage or Shed in 2026
Getting a reliable WiFi signal to a detached garage or shed is one of those home networking problems that sounds simple until you’re actually trying to solve it. The main house router is probably 50–150 feet away, with exterior walls and outdoor air in between. Standard WiFi extenders often don’t cut it — they halve the bandwidth and create a separate network your devices don’t roam onto cleanly. This guide covers the extend WiFi to garage in depth.
This guide covers the real options to extend WiFi to garage and shed spaces: running Ethernet underground (the best solution), using a dedicated outdoor access point, running a second wireless bridge, or using MoCA if you have coax infrastructure. Which approach makes sense depends on the distance, the obstacles, and how much work you’re willing to do.
Why Extending WiFi to a Garage Is Harder Than You’d Think
The challenge is physics. WiFi signals weaken with distance and struggle through certain materials:
- Wood-frame walls: Modest attenuation, manageable at short range
- Brick or concrete walls: Significant signal loss per wall
- Metal siding or metal roof: Extremely high attenuation — metal acts almost like a Faraday cage
- 50–150 feet of outdoor air: Signal drops with the square of distance
A typical indoor mesh node placed near an interior wall might not even reach a detached garage with a usable signal — especially through metal-sided structures. The methods that actually work bypass these limitations rather than fight them.
Method 1: Run Ethernet Underground to Extend WiFi to Garage (Best Option)
Running a burial-grade Ethernet cable from your house to the garage is the most reliable way to extend WiFi to a garage. You get full gigabit speed, no wireless interference, and the connection works regardless of building materials.
What you need:
– Direct Burial Cat6 cable: Rated for underground installation without conduit, though conduit is recommended for protection and future upgrades. Use Cat6A Ethernet Cable for long runs.
– Conduit (recommended): PVC or HDPE conduit protects the cable and lets you pull new cable later without digging again. 1-inch conduit is standard.
– A trench: 6–12 inches deep is sufficient for protected conduit. 18–24 inches for direct-burial cable without conduit.
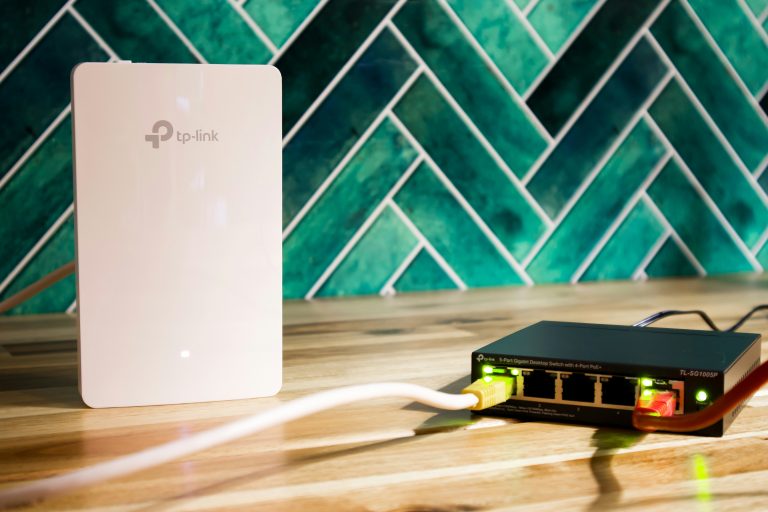
– An access point in the garage: Once you have Ethernet in the garage, mount a NETGEAR WAX630 Access Point and you have full-speed WiFi in the garage.
The work:
1. Identify entry and exit points on both buildings
2. Dig the trench (or rent a trenching machine for longer runs)
3. Pull cable through conduit, or lay direct-burial cable
4. Seal wall penetrations with exterior-grade caulk
5. Connect cable to your main switch inside and an access point in the garage
This is the right answer for most situations. A garage access point connected via buried Ethernet is essentially a second room of your house network — same SSID, seamless roaming, full speed. It’s the most reliable way to extend WiFi to garage spaces permanently.
For a detailed cable installation walkthrough, see How to Add Wired Networking to an Old House. Wikipedia’s article on structured cabling covers the relevant standards for cable categories and burial specifications. And the National Electrical Code overview on Wikipedia covers the burial depth rules that apply to low-voltage cable runs in most US jurisdictions.
Method 2: Outdoor Wireless Access Point with Ethernet Backhaul
If you can run Ethernet partway — from your main router/switch to an exterior wall mount — an outdoor access point can bridge the rest wirelessly. This is a good option when trenching is impractical but you can run Ethernet to an eave or exterior wall.
Dedicated outdoor access points are weatherproof, have more powerful radios than indoor APs, and can deliver usable signal over 100–200 feet outdoors. Models to look for:
- Ubiquiti UniFi AP Outdoor (UAP-AC-M): A solid outdoor AP that works with the UniFi ecosystem. Weatherproof, wall/pole mountable.
- TP-Link EAP225-Outdoor: Dual-band outdoor AP in the Omada ecosystem. Good performance for the price.
These APs still need an Ethernet run to the mounting location — they’re powered via PoE. You run the cable to the outside of the house, mount the AP on the eave or fascia pointing toward the garage, and it delivers WiFi across the gap.
This doesn’t work well through metal-sided garages — the signal still has to get inside somehow. Combine with a small indoor AP mounted inside the garage on its own Ethernet run from the outdoor AP if needed.
Method 3: Point-to-Point Wireless Bridge
When trenching truly isn’t an option and you need a full wired-speed connection in the garage, a point-to-point wireless bridge creates a dedicated wireless link between two buildings. The bridge devices communicate on a dedicated wireless channel (5GHz or 60GHz) and deliver Ethernet to each end. To the network, it looks like an Ethernet cable.
Common options:
– Ubiquiti NanoStation: Popular and reliable for spans up to 500 feet. Two units, each mounted with line-of-sight to the other, create a dedicated wireless uplink.
– TP-Link CPE510: Budget-friendly outdoor CPE for building-to-building wireless links.
Requirements:
– Line of sight: Point-to-point bridges work best (and often only reliably) with a clear line of sight between the two antennas. Trees, rooflines, or other obstructions cause problems.
– Power at both locations: Each bridge unit needs power — typically PoE from a switch at the house end and a PoE injector or switch at the garage end.
Once the bridge is set up, you connect an access point to the Ethernet output in the garage and get full network access. This approach can deliver 100–400 Mbps depending on the bridge hardware and distance.
Method 4: MoCA Adapter (If You Have Coax to the Garage)
If your garage has an existing coaxial cable run (common in homes built for cable TV), MoCA adapters convert that coax into a gigabit Ethernet link. No new cable, no trenching — just adapters at each end of the existing coax.
MoCA 2.5 adapters deliver up to 2.5 Gbps theoretical (around 800–1,000 Mbps real-world) and work reliably over coax runs up to 300 feet. Connect an access point to the garage MoCA adapter and you have full-speed WiFi in the garage.
Check whether coax runs from your main cable entry point to the garage — unconnected coax ports are common in garages. If the coax is there, MoCA adapters for home networks are the cheapest and easiest solution.
Method 5: Mesh Node as a Wireless Backhaul (Last Resort)
Placing a mesh satellite node in the garage using its wireless backhaul connection to the main mesh is the simplest option but generally the worst in terms of performance. The backhaul connection loses bandwidth with distance, and a metal-sided garage may not receive a usable backhaul signal at all.
If the mesh system supports a dedicated backhaul band (like the NETGEAR Orbi Quad-Band Mesh with a dedicated 5GHz backhaul), performance is better than dual-band mesh backhaul. But it’s still inferior to a wired connection.
Use this approach only if:
– The garage is close (under 50 feet) with no major obstacles
– Line of sight exists between the main hub and the garage node
– The application is low-demand (basic internet browsing, smart device control)
For high-bandwidth use cases (working from a garage office, streaming 4K video, video calls), a wireless backhaul mesh node will consistently underperform.
Choosing the Right Method
| Method | Speed | Reliability | Difficulty | Cost |
|---|---|---|---|---|
| Buried Ethernet + AP | Full gigabit | ★★★★★ | High (digging) | $100–300 |
| Outdoor AP (eave mount) | Full gigabit to AP | ★★★★★ | Medium | $80–200 |
| P2P Wireless Bridge | 100–400 Mbps | ★★★★☆ | Medium | $150–400 |
| MoCA (existing coax) | 800–1,000 Mbps | ★★★★★ | Low | $60–120 |
| Mesh wireless backhaul | 50–300 Mbps | ★★★☆☆ | Very Low | $0 (if owned) |
The buried Ethernet option is the gold standard. Every other method is a compromise. If you’re building a garage office or using the space regularly for bandwidth-intensive tasks, run the cable once and be done with it. When people ask how to extend WiFi to garage spaces reliably for the long term, buried Ethernet is always the right answer. No other method to extend WiFi to garage or outbuilding locations comes close in terms of consistent speed and reliability.
For more detail on wireless performance issues that affect garage setups, see How to Fix WiFi Interference in an Apartment — the same interference principles apply to any challenging wireless environment.
Frequently Asked Questions
How far can I run Ethernet underground to a garage?
Standard Cat6 supports runs up to 100 meters (328 feet) without signal loss. For most detached garages, this is more than enough. Beyond 100 meters, you’d need a switch or media converter at the midpoint, which is rare in home settings.
Do I need to hire an electrician to run Ethernet underground?
No. Running low-voltage Ethernet cable underground doesn’t require a licensed electrician in most jurisdictions — it’s not line voltage. Local building codes may require conduit or a specific burial depth. Check your local codes before digging, and always call 811 (in the US) to have underground utilities marked before you dig.
Can I use a WiFi extender to reach my garage?
You can, but it’s usually not a great experience. WiFi extenders halve bandwidth and create a separate network that devices don’t seamlessly roam onto. They work for very basic use (smart device control, occasional browsing) but aren’t suitable for work-from-garage scenarios. The options in this guide all perform significantly better.
What’s the best way to extend WiFi to a metal-sided garage?
Metal siding blocks wireless signals heavily. The best approach is to get a wired connection inside the garage — either via buried Ethernet or a MoCA adapter on existing coax — and then mount an access point inside the garage. Trying to push WiFi through metal walls is a losing battle.
How deep does Ethernet cable need to be buried?
Direct burial cable (without conduit) should be buried at least 6 inches deep in most areas, though 12 inches is safer and more common. Cable in conduit can be at 6 inches. The National Electrical Code (NEC) specifies burial depths — check your local jurisdiction’s adoption of NEC for exact requirements.
Will a mesh WiFi system work between my house and garage?
It depends on the distance and construction materials. For a close garage (under 40 feet) with wood-frame walls, a mesh satellite node might work acceptably. For metal siding or longer distances, wireless backhaul performance degrades significantly. A wired connection is always preferable for reliable, consistent performance.
Can I use my existing cable TV coax to extend network to the garage?
Yes, if you have coax running between your house and garage. MoCA adapters use that existing coax to carry Ethernet — no new cable required. This is often the easiest solution for homes with cable TV infrastructure. Check MoCA vs Powerline vs Ethernet for a full comparison of the options.