Home Assistant Getting Started Guide
Home Assistant is the most powerful open-source smart home platform available in 2026 — and also the one with the steepest learning curve. Once it clicks, you’ll never go back to walled-garden ecosystems. This home assistant getting started guide 2026 covers everything you need to get started: what hardware to run it on, how the installation process works, and what you can realistically accomplish in your first week. By the end, you’ll have a clear roadmap for setting up a fully local, cloud-free smart home.
Home Assistant integrates with over 3,000 devices and services natively. It runs locally, keeps your data on your network, and doesn’t depend on any cloud subscription to function. Automations trigger in milliseconds rather than seconds because nothing leaves your house to talk to an external server. Whether you’re a complete beginner or upgrading from a simpler platform like SmartThings or Hubitat, this guide walks you through every decision point.
Choosing Your Hardware
This is the first decision and the most consequential. Home Assistant runs on several platforms, with different trade-offs between convenience, performance, and expandability.
Hardware Comparison
| Hardware | Setup Difficulty | Performance | Expandability | Best For |
|---|---|---|---|---|
| Home Assistant Green | Easy | Good | Limited | Beginners, plug-and-play |
| Raspberry Pi 5 4GB | Medium | Excellent | High | Tinkerers, home lab users |
| Home Assistant Yellow | Medium | Excellent | High (M.2 NVMe) | Serious installs, Zigbee built-in |
| SkyConnect USB | N/A | N/A | Add-on | Zigbee/Matter on any hardware |
Option 1: Home Assistant Green — Best for Beginners
The Home Assistant Green is the official plug-and-play appliance from Nabu Casa, the company behind Home Assistant. It ships with HAOS (Home Assistant Operating System) pre-installed on eMMC storage. Plug in power and Ethernet, wait 2 minutes, and you’re at the onboarding screen.
Specs:
– SoC: Rockchip RK3566 (quad-core Cortex-A55, 1.8GHz)
– RAM: 4GB LPDDR4
– Storage: 32GB eMMC (pre-installed with HAOS)
– Connectivity: Gigabit Ethernet, 2x USB-A, 1x USB-C (power)
– No built-in Zigbee/Z-Wave (add via USB stick)
– Dimensions: 112 × 112 × 32mm
Who it’s for: Anyone who wants Home Assistant running without dealing with SD cards, OS flashing, or Linux. The Green handles typical home automation loads with room to spare — automations, dozens of devices, a few dashboards. Add a SkyConnect USB stick for Zigbee/Thread support.
Limitations: No M.2 slot, no built-in wireless radio. The eMMC storage is not user-upgradeable. Not the right choice if you want to run add-ons that are storage-intensive (like Frigate NVR for local camera AI).
Option 2: Raspberry Pi 5 4GB — Best Performance/Flexibility
The Raspberry Pi 5 dramatically outperforms its predecessor for Home Assistant workloads. With a quad-core Cortex-A76 at 2.4GHz and PCIe 2.0 via HAT+ connector, you can boot from NVMe SSD and run memory-intensive add-ons without compromise.
Specs:
– SoC: Broadcom BCM2712 (quad-core Cortex-A76, 2.4GHz)
– RAM: 4GB LPDDR4X
– Storage: microSD or NVMe via HAT+ (recommended: M.2 HAT+)
– Connectivity: Gigabit Ethernet, 2x USB 3.0, 2x USB 2.0, dual 4K HDMI, PCIe 2.0
– No built-in Zigbee/Z-Wave (add via USB stick)
Installation: Flash HAOS to a microSD or NVMe using Raspberry Pi Imager. Boot, connect to your network, navigate to homeassistant.local:8123.
Who it’s for: Users who want maximum add-on flexibility — running Frigate (local AI camera detection), Whisper (local voice recognition), Piper (local TTS), or other resource-heavy add-ons alongside Home Assistant. Also the right choice if you’re already comfortable with Pi hardware.
Limitations: Requires case, power supply, and storage selection — more decisions than the Green. Active cooling is recommended (official Pi 5 case with fan, or Argon ONE V3 M.2 case).
Option 3: Home Assistant Yellow — Best All-In-One for Enthusiasts
The Home Assistant Yellow combines a Raspberry Pi CM4 (or CM5) slot with built-in Zigbee radio (Silicon Labs MGM210P), M.2 NVMe slot, and PoE support. Everything integrated in a single board — Nabu Casa designed it specifically for Home Assistant.
Specs:
– Compute: Raspberry Pi CM4 or CM5 (sold separately or bundled)
– Built-in radio: Zigbee/Thread (Silicon Labs MGM210P) — no USB stick needed
– Storage: M.2 NVMe slot (PCIe 2.0 x1 via CM4, PCIe 3.0 x1 via CM5)
– Connectivity: Gigabit Ethernet (with PoE), 2x USB-A
– Power: PoE (802.3af) or USB-C
Who it’s for: Users who want built-in Zigbee without occupying a USB port, NVMe storage performance, and PoE-powered deployment (no separate power brick). The Yellow with a CM5 and NVMe SSD is the most capable dedicated Home Assistant hardware available.
Limitations: CM4/CM5 must be purchased separately (adding to cost). More expensive than the Green. Requires some assembly.
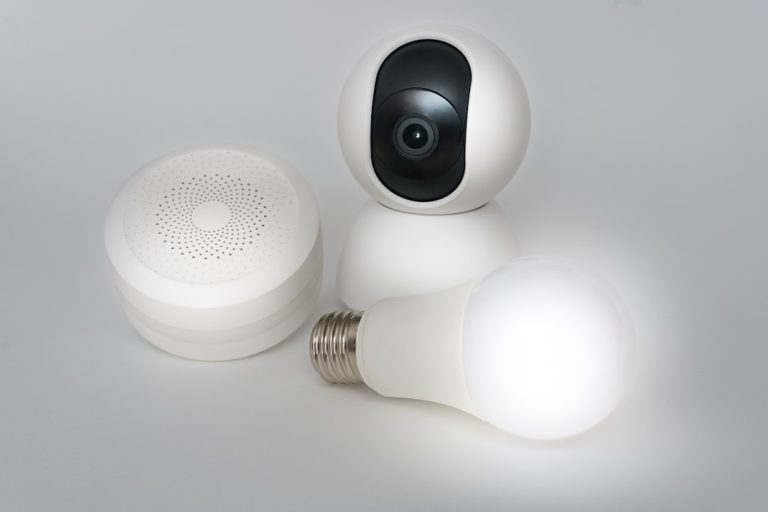
Add-on: SkyConnect USB Stick — Zigbee + Matter/Thread Radio
The Home Assistant SkyConnect (now rebranded as Home Assistant Connect ZBT-1) is a multiprotocol USB stick supporting Zigbee 3.0 and Thread/Matter via firmware. Plug it into any Home Assistant host — Green, Pi 5, Yellow, or even a generic x86 machine — and you get local Zigbee coordination without cloud dependency.
Specs:
– Chipset: Silicon Labs EFR32MG21
– Protocols: Zigbee 3.0, OpenThread (Matter border router)
– Interface: USB-A
– Range: ~30m line of sight
Who it’s for: Anyone running Home Assistant Green or a Pi 5 who wants to add Zigbee or act as a Thread border router for Matter devices. The SkyConnect turns your HA host into a full Matter controller without needing a separate Apple or Google hub.
Home Assistant Getting Started: Installation Steps
The official Home Assistant installation guide covers every supported platform in detail — HAOS is recommended for new users because it handles updates and add-on management automatically. Here’s the condensed process:
- Download HAOS image for your hardware from home-assistant.io/installation
- Flash to storage using Balena Etcher or Raspberry Pi Imager
- Boot the device and connect via Ethernet
- Navigate to
http://homeassistant.local:8123(or use your router’s DHCP table to find the IP) - Complete onboarding — create an account, detect devices on your network
- Install add-ons via the Add-on Store: MQTT broker (Mosquitto), Z-Wave JS UI, File Editor, Terminal
If you run into any issues during onboarding, the Home Assistant configuration documentation is comprehensive and regularly updated. The community forums are also extremely active — most issues beginners encounter have already been solved and documented.
First Week: What to Actually Set Up
Day 1 — Devices and integrations: Home Assistant will auto-discover Philips Hue bridges, Sonos speakers, Roku devices, Shelly switches, and many others via mDNS/SSDP. Accept what’s relevant, ignore the rest.
Day 2 — MQTT + Zigbee: If you have a SkyConnect or Yellow, install Zigbee Home Automation (ZHA) integration and pair your first Zigbee device. Alternatively, install Zigbee2MQTT add-on for broader device support and more control.
Day 3 — Automations: Start simple. Motion sensor turns on light, turns off after 5 minutes. Presence detection (using the HA companion app on your phone) changes the house mode to Away.
Day 4 — Dashboard: Customize the Lovelace UI. Add weather, device status, camera feeds. Install HACS (Home Assistant Community Store) for community cards and integrations not in the official repo.
Day 5 — Backups: Set up automated backups to local NAS or cloud. Home Assistant Backup add-on supports Google Drive and local targets. A broken update without a backup is painful — configure this before you need it.
Key Concepts to Understand
- Entities are the atomic units — each sensor reading, switch state, or light brightness is an entity
- Integrations connect devices/services and create entities automatically
- Automations trigger actions based on entity state changes, time, or events
- Scripts are reusable sequences of actions
- Scenes capture a specific state of multiple entities for one-tap recall
- Add-ons are Docker containers managed by HAOS — they extend functionality (MQTT broker, VPN, NVR, voice recognition)
Recommended First Add-ons
| Add-on | Purpose |
|---|---|
| Mosquitto MQTT Broker | Local MQTT for Zigbee2MQTT and ESPHome devices |
| Zigbee2MQTT | Zigbee coordinator with wide device support |
| ESPHome | Flash and manage DIY ESP8266/ESP32 devices |
| File Editor | Edit YAML configs via browser UI |
| Studio Code Server | VS Code in the browser for complex configs |
| Frigate NVR | Local AI object detection for cameras |
Is Home Assistant Right for You?
Home Assistant rewards patience. The first few hours can be frustrating — YAML syntax errors, integrations that need manual configuration, add-ons that require network tweaks. But the payoff is a smart home platform that’s genuinely yours: no monthly fees, no cloud dependencies, no features locked behind subscriptions, and no risk of a vendor shutting down and bricking your devices.
If your priority is simplicity above all else, Amazon Alexa or Google Home might be a better short-term fit. But if you want real automation logic, local control, and a platform that will still be running in ten years regardless of what any company decides — Home Assistant is the answer. Thousands of users who followed a home assistant getting started guide 2026 like this one have made the switch and never looked back.
For smart plug recommendations that work well with Home Assistant, see our best smart plugs 2026 guide. For smart lock integrations, see best smart locks 2026.
Final Thoughts
This home assistant getting started guide 2026 should give you enough to make a confident hardware decision, complete your first install, and start building real automations in your first week. The platform has never been more accessible — hardware options now range from the dead-simple HA Green to the powerhouse Yellow with CM5 and NVMe. Pick the platform that matches your comfort level and grow from there. The Home Assistant ecosystem is massive, the documentation is excellent, and the community is one of the most helpful in the open-source world.
Common First-Week Problems and How to Fix Them
Almost every new Home Assistant user hits a few predictable friction points in their first week. Here are the most common ones and their solutions.
Devices not auto-discovered: Home Assistant discovers devices via mDNS/SSDP on your local network. If your HA host is on a different VLAN or subnet from your devices, discovery won’t work across the subnet boundary. Make sure HA is reachable on the same VLAN as your devices initially, then configure mDNS bridging once you understand the network topology. Also confirm your router isn’t blocking multicast.
Zigbee devices not pairing: The SkyConnect USB stick needs to be in pairing mode (ZHA: click “Add Device” in ZHA; Zigbee2MQTT: enable permit_join). Zigbee devices that were previously paired to another hub need a factory reset first — the reset procedure varies by device. For Ikea Tradfri bulbs, cycle power 6 times. For Philips Hue bulbs, use the Touchlink reset procedure. If a device won’t pair, check the Zigbee2MQTT device list for known pairing procedures.
Automations not triggering: The most common cause is a condition that silently fails. In HA’s automation editor, use “Trace” to see exactly what happened the last time the automation ran — it shows which trigger fired, which conditions evaluated (and whether they passed or failed), and which actions executed. This turns confusing silence into a clear debugging path.
The home assistant getting started guide experience of “it worked once but not reliably”: Usually a network reliability issue — HA can’t reach a device intermittently because of Wi-Fi, and the integration marks the entity as unavailable. For critical devices (locks, alarms, critical sensors), wired Ethernet or Zigbee/Z-Wave is more reliable than Wi-Fi. Check the HA logbook for “unavailable” state changes to identify the problematic devices.
Updates breaking things: HA releases monthly. Before updating, check the HA blog for breaking change announcements. Set up automated backups (Settings → System → Backups) before you need them. If an update breaks an integration, the HA community forums will have a thread within hours — searching “[integration name] + version number + issue” usually finds both the cause and the fix quickly.