How to Set Up a Guest WiFi Network
Every home network should have a guest WiFi network — not just for visitors, but for smart home devices, IoT gadgets, and anything you don’t fully trust on your primary network. Knowing how to set up a guest WiFi network properly takes less than five minutes on most modern routers, costs nothing, and is one of the most impactful security improvements you can make without buying new hardware. Here are the setup steps, the settings that actually matter, and how to decide what goes on the guest network.
Why You Should Set Up a Guest WiFi Network
The obvious use case is visitors — guests get internet access without learning your main WiFi password. They can’t access your NAS, printers, smart home devices, or any other device on your primary network.
But the more important reason to configure this isolated network in 2026 is IoT isolation. The average home now has 15–30+ connected devices: smart TVs, robot vacuums, smart plugs, security cameras, thermostats, door locks, and more. Many of these devices run outdated firmware, use weak credentials, and have poor security track records. In 2023, CISA documented how compromised IoT devices on home networks were being used as pivot points to access computers, financial credentials, and sensitive data.
This isolated network for IoT means that even if a smart bulb or security camera is compromised, the attacker can’t reach your laptop, NAS, or other valuable devices on the primary network. This is called network segmentation, and a guest network is the simplest implementation available on consumer hardware — no VLANs or managed switches required.
What a Guest WiFi Network Actually Does
When you configure one on a modern router, it creates:
- A separate SSID — a distinct network name and password, independent of your main network.
- Client isolation — devices on the guest network cannot communicate with devices on your main network. They can only reach the internet (or other guest network clients, depending on your settings).
- Optionally, a bandwidth limit — throttle guest speeds to prevent visitors from saturating your connection.
- Optionally, content filtering — some routers let you apply DNS filtering only on the guest network.
What a basic guest network doesn’t provide: advanced VLAN tagging, per-device access rules, or QoS prioritization over the guest segment. For those, you need managed switches and a router with VLAN support (OPNsense, pfSense, or UniFi). But for most home users, the built-in guest WiFi is the right starting point.
How to Set Up a Guest WiFi Network: Step-by-Step by Router Brand
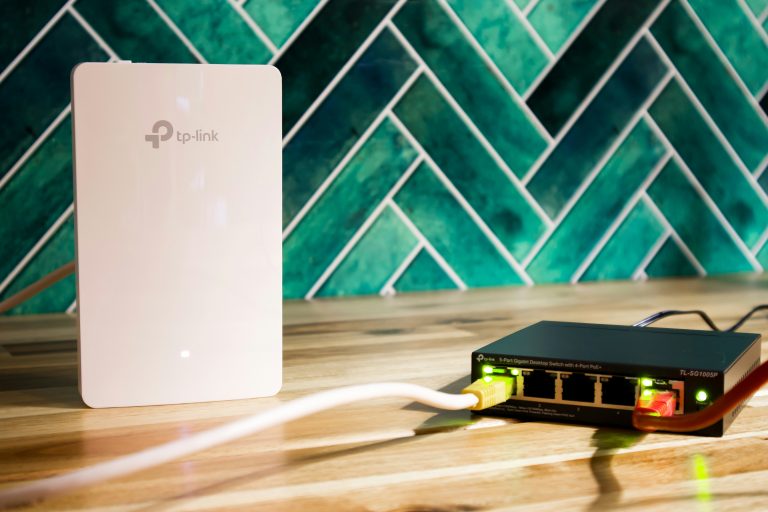
TP-Link Archer Routers
- Log into the admin panel at 192.168.0.1 or tplinkwifi.net
- Navigate to Advanced > Wireless > Guest Network
- Enable the guest network for 2.4 GHz, 5 GHz, or both
- Set a network name (SSID) and password
- Set “Access to My Local Network” = OFF — this is the critical isolation setting
- Optionally set a bandwidth limit in Mbps up/down
- Save and apply
TP-Link also lets you share the guest network password via QR code from the admin panel — convenient for guests.
TP-Link Deco (Mesh Systems)
- Open the Deco app
- Tap More > Guest Network
- Enable it, set SSID and password
- Enable “Isolate Guest Network” = ON — ensures guest devices can’t reach main network
ASUS Routers
- Log into the router at 192.168.1.1
- Go to Guest Network
- Select the band (2.4 GHz or 5 GHz) to configure
- Enable the guest network
- Set SSID and security/password
- “Access Intranet” = OFF (this is the isolation control)
- Optionally configure time limits, bandwidth caps, and MAC-based filtering
- Apply
ASUS routers support up to three guest networks per band — one for visitors, one for IoT, one for family devices if desired.
Netgear Routers
- Log into routerlogin.net
- Go to Advanced > Advanced Setup > Wireless Settings, or look for “Guest Network” in the sidebar (varies by model)
- Enable the guest network for your preferred band
- Set SSID and security
- Disable “Allow guests to see each other and access my local network”
- Save
Ubiquiti UniFi
UniFi provides the most control for users who want proper network isolation:
- In UniFi Network, go to Settings > WiFi
- Click Create New WiFi
- Name the SSID (e.g., “Guest” or “IoT-Devices”)
- Set security and password
- Under Network, assign it to a separate VLAN-backed network (create the network first under Settings > Networks)
- Enable “Client Device Isolation” to prevent IoT devices from talking to each other
- Save and Apply Changes
UniFi’s approach of backing the guest SSID with a dedicated VLAN is the correct architecture. Each SSID maps to a network, and each network gets its own subnet and firewall rules. This gives you full traffic control between segments — far more powerful than a basic guest toggle.
Eero (Amazon)
- Open the Eero app
- Go to Settings > Guest Access
- Toggle Guest Access ON
- Set SSID and password
- The guest network is isolated from your main network by default — no additional setting needed
Eero’s guest network also automatically extends to all Eero nodes in the system.
The Most Important Setting: Local Network Access Must Be OFF
When you configure the isolation settings, one thing overrides everything else in importance: access to the local network must be disabled. This setting has different names depending on your router:
- TP-Link: “Access to My Local Network” → OFF
- ASUS: “Access Intranet” → OFF
- Netgear: “Allow guests to see each other and access my local network” → UNCHECKED
- Eero: Disabled by default
If this setting is on (or left at default if the default is enabled), devices on the guest network can reach your main network — defeating the entire purpose of network isolation. Always verify this is disabled and test it after setup by connecting a device to the guest SSID and attempting to ping a device on your main network (it should fail).
Best Configuration Settings for a Guest WiFi Network
Use a separate, strong password for IoT devices. The guest network password for IoT devices should be different from both your main WiFi password and your visitor guest password. You never share the IoT password — it’s entered once per device and forgotten.
Consider two separate guest SSIDs. Set up one for visitors (easy-to-share password, bandwidth-limited) and a second for IoT devices (strong password, never shared). Many routers support multiple guest SSIDs simultaneously.
Enable bandwidth limiting on visitor guest. Set a per-client limit (50–100 Mbps is usually appropriate) so one streaming device doesn’t saturate your connection for other users.
Use WPA2 or WPA3 on every network. Never configure a guest network without a password (open WiFi). Even for visitors, use WPA2 minimum. WPA3 is available on modern hardware and is worth enabling.
Set a custom DNS for the guest network if your router supports it. Cloudflare 1.1.1.3 blocks malware and adult content — appropriate for a visitor-accessible guest SSID. NextDNS gives you per-profile filtering with detailed query logs.
Guest WiFi Across a Mesh System
If you run a whole-home mesh system — Eero, TP-Link Deco, Ubiquiti UniFi, Google Nest WiFi Pro — the guest SSID automatically extends to all mesh nodes. Any device connecting to the guest SSID anywhere in the house (living room, garage, back bedroom) gets the same isolated access.
This matters for IoT devices specifically: a smart TV in the living room and a security camera over the garage should both connect to the IoT guest SSID, regardless of which mesh node is nearest. Modern mesh systems handle this correctly with a single guest SSID configuration.
For more on which mesh systems handle network segmentation best, see our best mesh WiFi system guide for 2026.
What to Put on Your Guest Network vs Your Main Network
Move these to the guest/IoT network:
– Smart TVs and streaming sticks (Roku, Fire TV, Apple TV)
– Robot vacuums (Roomba, Roborock, Dreame)
– Smart plugs, power strips, and smart lights
– Cloud-based security cameras (Ring, Arlo, Wyze, Blink)
– Smart thermostats and climate control devices
– Game consoles (they work fine isolated — they mostly need internet, not LAN access)
– Amazon Echo and Google Home speakers (mostly work from guest network for voice and streaming)
Keep these on the main network:
– Laptops and desktop computers used for work, banking, or sensitive data
– NAS devices (require LAN access for local transfers)
– Network printers (needed by main-network devices)
– Home Assistant server (needs LAN access to control local devices)
– Any device you actively manage or remotely access
The complicated cases:
– Apple HomeKit accessories typically require the same subnet as the HomePod hub — putting HomeKit devices on a guest network may break local control. Check your specific devices.
– Home Assistant with local devices — the HA server stays on the main network; the IoT devices it controls can be on the guest network if HA can still reach them (it can, across subnets, if routing is configured)
– Smart home hubs (SmartThings, Hubitat) — these need local LAN access to control Z-Wave/Zigbee devices; keep the hub on main network, put only the cloud-connected devices on guest
Guest Network Limitations vs Full VLAN Segmentation
A basic isolated SSID separates guest/IoT devices from your main network, but all guest network devices can still communicate with each other. For most homes this is acceptable — your smart TV talking to your robot vacuum on the guest segment is not a meaningful threat.
If you want true device-level isolation — each IoT device in its own segment, unable to reach any other device — you need per-device VLANs and a managed switch. This is an advanced home lab setup increasingly common among enthusiasts running OPNsense or pfSense. Our pfSense vs OPNsense guide covers the firewall platforms that make full VLAN segmentation practical for home networks.
The guest network covers approximately 80% of the security benefit for 5% of the effort. Start here, then step up to VLANs if you want tighter control. For the switches needed to implement proper VLAN segmentation, see our best PoE switches for home guide and best 2.5G switches for home network guide.
External Resources
For authoritative guidance on home network security architecture, CISA’s home network security guide is the best free resource. For router-specific documentation, TP-Link’s Archer guest network support page covers the Archer lineup in detail.
Frequently Asked Questions
Does a guest network slow down my main network?
No. A guest SSID uses the same radio hardware as your main network. Enabling a guest network doesn’t reduce throughput for your main network unless guest devices are consuming significant bandwidth. If you’re concerned about this, enable the bandwidth limit on the guest SSID to cap per-client speeds.
Can guest network devices see each other?
By default on most routers, yes — devices on the same guest SSID can communicate with each other. If you want to prevent this (useful for IoT devices that have no reason to communicate), look for a “client isolation” option in your router’s guest network settings. ASUS, UniFi, and most managed systems support per-SSID client isolation.
How do I share the guest WiFi password easily?
Most modern routers (TP-Link Archer, ASUS, Eero) can generate a QR code for the guest SSID. You can also print the SSID/password on a small card. Many users just display the guest network name and password on their phone and have guests scan the QR code from the router’s app.
Is a guest network as secure as a VLAN?
A properly configured guest network provides similar isolation from your main network. The key difference: VLANs with a managed switch and firewall rules give you more granular control over exactly what each device can reach — you can allow IoT devices to reach a specific port on your NAS while blocking everything else. Basic guest networks are binary: internet-only access. For most homes, guest network isolation is sufficient.
What if my router doesn’t have a guest network option?
Most routers released in the last five years support guest networks. If yours doesn’t, consider upgrading — a basic Wi-Fi 6 or Wi-Fi 7 router with guest network support is available for $50–80. Alternatively, you can add a second router in AP mode on a separate subnet to serve as your “guest network,” but that’s more complex than it’s worth. Upgrading the router is simpler.
Can I use the guest network for my smart home devices permanently?
Yes. Many users permanently configure all their IoT devices on the guest/IoT SSID. The “guest” label is just a name — the isolated SSID works perfectly as a permanent IoT network. Use a strong password that you don’t share with actual guests, and treat it as a dedicated IoT zone rather than a temporary network.